




¿Tienes una cuenta?
Inicia sesión para finalizar tus compras con mayor rapidez.

We'll take you to the best site for your location.
Switching from a controller to a mouse and keyboard is a skill-building process, not an overnight change. Start with stable settings and simple keybinds, then focus on building basic mouse control and movement consistency.
Short, focused practice sessions are more effective than constantly grinding matches without purpose. As your muscle memory develops, movements that once felt awkward will become automatic.
Whether you're playing FPS, Battle Royale, MOBA, or action RPGs, combining the right equipment with focused daily training will help you transition smoothly from controller to mouse and keyboard—and unlock the precision and control that PC gaming offers.

The short answer is yes—but only at first.
Switching from a controller to a mouse and keyboard requires your brain to build completely new muscle memory. Instead of relying on two analog sticks, you're coordinating your arm, wrist, fingers, and dozens of keyboard keys simultaneously. Because of this, it's completely normal for your performance to drop during the first few days or weeks.
Most players adapt much faster than they expect once their hand coordination improves. With consistent practice, proper mouse sensitivity, optimized keybinds, and short daily aim training sessions, most players become noticeably more comfortable within one to two weeks. Over time, mouse and keyboard provide greater aiming precision, faster reactions, and more control than a controller in many competitive games.
Switching from controller to mouse and keyboard often comes with a short adjustment period. Most beginners struggle with keybind confusion, aiming control, or movement coordination. These problems are normal and can usually be fixed with small adjustments.
| Problem | Possible Cause | Fix |
|---|---|---|
| Accidentally pressing the wrong keys | Changed too many keybinds at once and muscle memory has not formed yet | Keep the default keybinds first. Only customize 1–2 important keys at a time and practice until they feel natural |
| Mouse constantly overshoots targets | Sensitivity is too high or your hand is too tense while aiming | Lower your sensitivity slightly and relax your grip. Use smoother arm and wrist movements instead of forcing quick corrections |
| Turning around feels too slow | Sensitivity is too low or your mouse space is limited | Increase sensitivity gradually or create more desk space for larger mouse movements |
| Can move but cannot aim at the same time | Practicing aiming separately without combining movement | Practice tracking drills while moving. Train strafing, aiming, and shooting together in the practice range |
| Wrist or forearm discomfort | Incorrect posture, poor desk height, limited arm support, or gripping the mouse too tightly | Take breaks immediately, adjust your sitting position, keep your arm supported, and loosen your grip |
Remember: Consistency Beats Speed
When learning mouse and keyboard, beginners often try to improve too quickly by constantly changing sensitivity, keybinds, or settings. This slows down muscle memory development.
Stick with one setup for several days, focus on smooth movements, and make small adjustments only when you clearly identify a problem. Over time, your hands will naturally adapt and your control will improve.
Before you begin aim training, make sure your mouse, keyboard, and monitor are properly configured. The right gaming setup improves aiming consistency, movement precision, and reaction speed while making it easier to build reliable muscle memory.
| Setup Component | Recommended Standard | Common Limitation | Why It Hurts Performance | Recommended Upgrade |
|---|---|---|---|---|
| Mouse Pad | XL mouse pad (16 × 14 in / 40 × 35 cm or larger) | Small pad (under 12 × 10 in) | Limits arm movement, encouraging higher sensitivity and reducing aiming consistency. | Use an XL mouse pad and lower your sensitivity. |
| Mouse Pad Surface | Premium cloth or glass mouse pad | Worn, uneven, or muddy surface | Inconsistent friction disrupts muscle memory and tracking accuracy. | Replace the mouse pad with a premium cloth or glass surface. |
| Gaming Mouse | Lightweight (<70 g) with a modern optical sensor | Heavy mouse (90–100 g+) or outdated laser sensor | Extra weight slows flicks, increases fatigue, and reduces precision. | Switch to a lightweight gaming mouse with a modern optical sensor. |
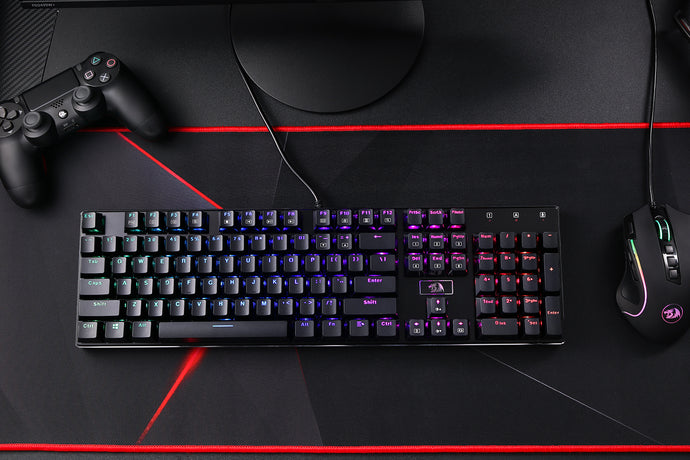
| Keyboard | Hall Effect keyboard with Rapid Trigger | Membrane keyboard or fixed mechanical switches | Slower movement inputs and less responsive strafing. | Upgrade to a Hall Effect keyboard with Rapid Trigger. |
| Monitor & PC | 144Hz+ with stable FPS | 60Hz monitor or inconsistent frame rate | Motion blur makes enemies harder to track and react to. | Upgrade to a 144Hz+ monitor and maintain stable FPS. |
| Mouse Settings | Raw input with mouse acceleration disabled | Mouse acceleration ("Enhance Pointer Precision") enabled | Cursor movement varies with hand speed, making muscle memory inconsistent. | Disable Windows mouse acceleration ("Enhance Pointer Precision"). |
Your mouse DPI and in-game sensitivity determine how fast your crosshair moves and how much control you have while aiming. Finding the right FPS sensitivity settings helps improve accuracy, tracking, and muscle memory when switching from controller to mouse and keyboard.
DPI (Dots Per Inch) controls how fast your mouse responds to physical movement:
For most FPS beginners, 800 DPI is a good starting point because it offers a balance between speed and accuracy.
In-game sensitivity controls how much your camera moves based on your mouse input. Your overall aim speed depends on both DPI and in-game sensitivity.
You can compare settings using eDPI (Effective DPI):
eDPI = Mouse DPI × In-Game Sensitivity
Example:
800 DPI × 0.5 Sensitivity = 400 eDPI
If you frequently overshoot targets, your sensitivity may be too high. If turning feels slow or uncomfortable, it may be too low. Avoid changing your sensitivity every day—keeping consistent settings helps build reliable mouse muscle memory and improve long-term aim performance.
Keyboard Hand Placement for BeginnersWhen switching from controller to mouse and keyboard, learning proper keyboard hand placement is one of the first steps. Unlike a controller, PC gaming requires your left hand to control movement, abilities, weapon switching, and other keybinds at the same time.
The standard WASD keyboard layout helps beginners build consistent muscle memory for FPS games.
| Key | Common Use | Recommended Finger |
|---|---|---|
| W | Move forward | Middle finger |
| A | Move left / Strafe left | Ring finger |
| S | Move backward | Middle finger |
| D | Move right / Strafe right | Index finger |
| Shift | Sprint / Walk slowly | Pinky finger |
| Ctrl | Crouch / Crouch movement | Pinky finger |
| Space | Jump | Thumb |
| R | Reload weapon | Index finger |
| E / F | Interact / Use abilities | Index finger |
| 1–4 | Switch weapons or abilities | Adjust based on comfort |
Switching from controller to mouse and keyboard requires new muscle memory. Beginners should focus on a simple, consistent setup instead of copying pro player settings or constantly changing keybinds.
Pro settings can be a reference, but they are not always suitable for everyone. Start with a standard layout and adjust only when certain keys feel uncomfortable or affect gameplay.
Keep core controls unchanged at first:
Change only 1–2 keys at a time to build reliable muscle memory.
Mouse side buttons work well for frequently used actions, such as:
Avoid assigning too many actions, as it may affect your grip and aiming control.
Yes. Disable mouse acceleration for more consistent aiming. Turning it off helps your hand movements translate into predictable in-game movements and improves muscle memory.
For Windows users, disable "Enhance Pointer Precision" and keep your DPI and sensitivity settings consistent.
Beginner Tip: A stable setup is better than a perfect setup. Spend more time practicing and less time changing settings.
Different game genres require different mouse and keyboard skills. Beginners should focus on the core mechanics first before practicing advanced techniques.
| Game Genre | Start With First | Advanced Skills to Practice Later |
|---|---|---|
| Tactical Shooters (Valorant, CS2) | Stopping movement before shooting, crosshair placement | Counter-strafing, angle clearing, precision flicks |
| Hero Shooters (Apex Legends, Overwatch 2) | Tracking targets while moving, basic strafing | Vertical tracking, target switching, movement combos |
| Open-World Action RPGs (Horizon Zero Dawn, Horizon Forbidden West) | Weak-point aiming, weapon switching | Precision flicks, projectile timing, ability combinations |
| Looter Shooters & RPGs (The Division 2) | Basic tracking, recoil control | Sustained tracking, target transitions, combat movement |
| Battle Royale (Fortnite) | Weapon switching, movement control | Building, editing, fast turns, target switching |
| MOBA (League of Legends, Dota 2) | Accurate clicking, basic hotkeys | Camera control, ability combos, faster APM |
When switching from controller to mouse and keyboard, beginners should build basic movement and aiming control before learning advanced mechanics. Focus on basic control first before learning advanced mechanics.
Mastering the keyboard means understanding how movement manipulates your weapon accuracy and hitbox. Use these three foundational keyboard techniques to out-maneuver your opponents.
Games like Valorant and Counter-Strike 2 reward precision. However, firing while your character is moving causes your bullets to become highly inaccurate. Before every accurate shot, you need to stop your movement instantly.
This quick direction change instantly cancels your momentum, allowing your weapon to regain maximum accuracy for precise headshots.
The faster your keyboard registers key release and activation, the easier counter-strafing becomes.
Hall Effect keyboards with Rapid Trigger technology—such as the Redragon ANTONIUM K745 HE or Redragon EISA K686 HE —can detect key release almost instantly. Instead of waiting for a fixed reset point, the switch resets as soon as your finger begins lifting, making movement feel significantly more responsive during high-pressure duels.

One of the biggest mistakes beginners make is swinging wide around corners, exposing themselves to multiple enemies simultaneously.
Slicing the pie helps you clear angles one at a time while keeping your exposure to a minimum.
This technique reduces unnecessary risks and gives you more time to react if an opponent appears.
Pro Tip: Pairing disciplined movement with a lightweight gaming mouse improves your ability to make small crosshair corrections while peeking corners.
Games such as Apex Legends, Overwatch 2, and The Division 2 feature much longer gunfights than tactical shooters. Standing still makes you much easier to hit.
Instead, you need to combine movement and aiming at the same time.
Move in the same direction as your opponent.
Mirroring reduces the amount of mouse movement needed to keep your crosshair on target, making tracking smoother and more consistent.
Move in the opposite direction of your opponent.
This makes you much harder to hit, but it also requires faster mouse control and more precise tracking.
A lighter mouse may help reduce fatigue during long tracking sessions—such as the Redragon K1NG M916 ULT —can help reduce fatigue during long tracking sessions while maintaining smooth, accurate cursor movement.

Movement and aiming should always be trained together rather than separately. Start slowly in practice modes before using these techniques in real matches.
Perform these isolated exercises in a dedicated trainer like Aimlabs (Free on Steam) for 15 minutes before launching your primary game.
Training Task: Play Gridshot (Aimlabs) or Tile Frenzy (Kovaak's).
Game Practice Time:30–60 min
How to Practice: Keep your forearm resting comfortably on the desk. Use your arm to move the mouse across large distances, then rely on your wrist and fingers for precise micro-adjustments. Focus on moving smoothly and drawing straight, controlled lines from one target to the next instead of rushing for speed.
Self-Check: If your hand or forearm starts to tense up, your sensitivity may be too low, or you may be gripping the mouse too tightly. Stay relaxed, keep a light grip, and let your arm and wrist work together naturally.

Task: Sixshot or Microshot Precision.
Game Practice Time:30–60 min
Procedure: Targets are tiny dots. Flick quickly near the dot, pause slightly, then use your fingers to execute a clean micro-correction onto the target.
Diagnostic Check: If you keep bouncing past the targets, your sensitivity is too high. If your hand shakes, lighten your physical grip.
Task: Sphere Track or Thin Shaft.
Game Practice Time:30–60 min
Procedure: Track a smoothly moving orb (essential for shredding armor in The Division 2). Do not predict its path. Keep your eyes on the target itself, not your crosshair, and react purely to visual direction changes.
Diagnostic Check: If your tracking looks shaky, slow down and focus on smooth movement. Lighten your hand pressure on your glass pad to let the mouse glide smoothly.

Task: Bounce 180 Tracking or Multishot Ultimate.
Game Practice Time:60 min
Procedure: Combine your skills. Explosively flick to a moving target, track it smoothly until eliminated, and instantly target-switch to the next closest orb.
Diagnostic Check: Minimize dead time between targets by scanning your eyes to the next dot while finishing your current shot.

Switching from controller to mouse and keyboard takes time, especially during the first few weeks. Missed key presses, awkward movement, and inconsistent aim are all part of the adjustment process.
Focus on stable settings, simple keybinds, and short daily practice sessions. As your coordination improves, aiming and movement will gradually feel more natural and consistent.
Whether you play FPS, MOBA, or action games, building good muscle memory habits early will make improvement much easier over time.
